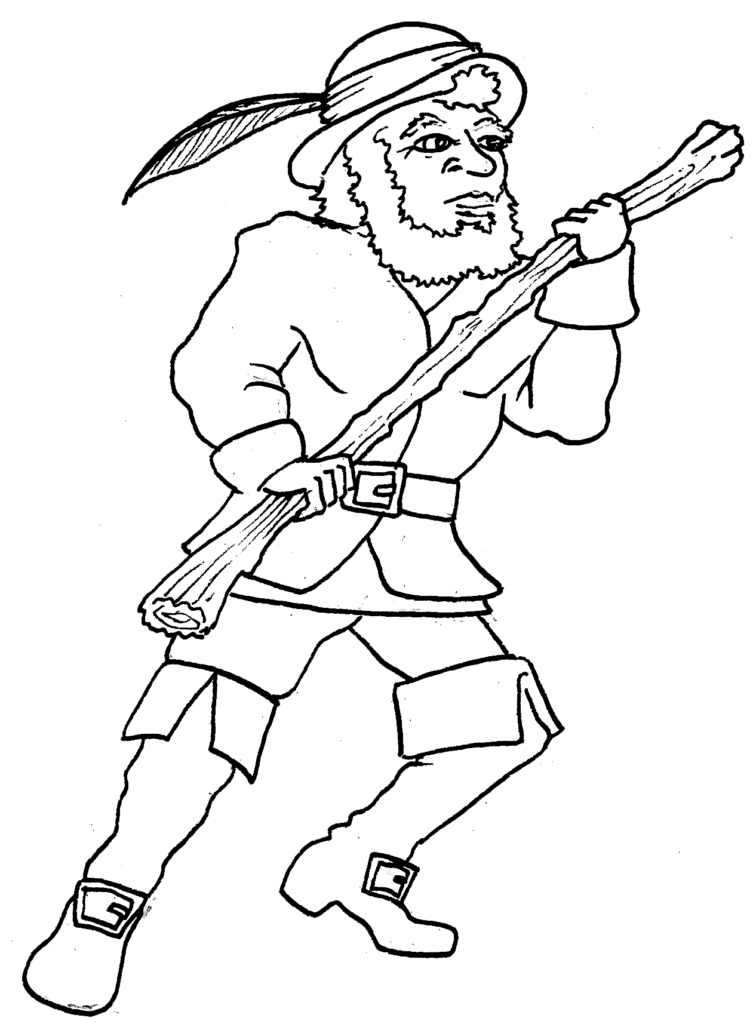
Day 4- Tunnel Fighters
When two enemies come face to face in the damp, dark confines of a tunnel there’s usually only one outcome… fight! Fighting is worked out using the colour-coded dice inside today’s advent window. The orange dice are Attack Dice and the blue dice are Defence Dice.
To attack, a model can Take a Swing at any model in a space to its front, left or right. Models cannot usually Take a Swing at enemies in diagonally adjacent spaces or squares to their rear, although there are special circumstances that allow this. Take a Swing is a special kind of action because it can only be performed once per turn but models can commit any amount of their remaining Stamina to the attack. Taking a Swing does not have to be the last thing a model does in its turn. A model can (for example) Move, Take a Swing and then Move again or Take a Swing, Move and Open a Door. The only restriction is that a model can only Take a Swing once during its turn. When a model Takes a Swing the controlling player takes a number of Attack Dice equal to the model’s Strength and adds further Attack Dice equal to the Stamina used in the attack. For example, a Gnome with a Strength of 3 chooses to use 2 Stamina to Take a Swing and so rolls 5 Attack Dice. Note that because Take a Swing is an action at least 1 Stamina must be spent in the attack, a model cannot attack if it has run out of Stamina.
If the opponent can see their attacker then they roll a number of Defence Dice equal to their Strength and may spend extra Stamina to increase the number in the same way should they have any Stamina left over from their last turn. For example, a Goblin which used 2 of its 4 Stamina in its last turn could spend the remaining 2 defending itself, adding 2 Defence Dice to its Strength (1) and rolling 3 Defence Dice. If a model cannot see its attacker it does not get to roll any dice in defence. Defending is not an action and so a model can defend itself even if it has no Stamina remaining, it is just less effective due to being exhausted.


Once all dice have been rolled look for and remove any pairs of matching Attacking and Defence Dice. For example, if the attacking Gnome rolls 1,2,2,4,5 and the defending Goblin rolls 2,3,5 then one 2 and the 5 cancel out leaving remaining Attack Dice of 1, 2 and 4 and an unused Defence Dice of 3. The attacker can pick the number on one of the remaining Attack Dice and apply the corresponding result as shown below. If they have no Attack Dice remaining the result is a draw.
1- Git Shot: The attacker stamps hard on their opponent’s foot, kicks them in the shins or does something else unsportingly painful. The loser takes 1 Damage.
2- Shunt: The defender is forced one space backwards or to either side as the attacker’s blows rain down on them.
3- Strike: The attacker lands a blow on their opponent, dealing 2 Damage.
4- Floor: The attacker knocks their opponent over. The defender falls Prone.
5- Roar: Invigorated, the attacker recovers 3 points of Stamina. Their Stamina cannot go above its starting level. They can take further actions now (but not Take a Swing again) or may save the recovered Stamina for defence.
6- Heavy Blow: The attacker deals a massive blow to their opponent, inflicting 3 Damage.


DAMAGE
Damage reduces a model’s Endurance by the amount indicated. A black Endurance Dice can be used to indicate how much Endurance a model has taken or has remaining (whichever you choose, remember and be consistent!). When a model has 0 Endurance remaining it is dead and should be removed.
PRONE
A model which is Prone should be laid on its back. It cannot perform any Actions until it gets up again. To get up the model Performs a Recover Action and is then stood up and faced in any direction. A model which is Prone rolls no Defence Dice if attacked.


CHARGE!
If a model is not in a space adjacent to an enemy but can see them it can Charge into the fight. Charge Moves are regular Move Actions but build up momentum for when the model cannons into its opponent. If it reaches its opponent with at least one Stamina left to fight AND its opponent has not been able to see the attacker coming then add one Attack Dice for each space the model Charged.
In the example above the Gnome is facing away from the Goblin and standing close enough to a light source for the Goblin to see it. The Goblin can use two Move Actions to Charge into a position where it can take a swing at the Gnome and add an extra 3 Attack Dice for the Charge (one per space moved).
The maximum number of Attack or Defence Dice that can be rolled at any time is 10.